




Tracing Worksheets for Preschool: What to Teach, in Order
How to teach tracing to preschoolers in six stages, from big arm movements to letters, with the sign a child is ready to move on and common fixes.
In short
- Teach tracing in order: arm movements, straight lines, zigzags and waves, circles, shapes, then letters.
- Move up a rung only when lines start at the start, stop at the end and stay mostly on the path.
- Tracing is step one. Copying and writing with no dots show whether the child has learned it.
You hand a three year old a letter tracing page. Two minutes later the dots are buried under scribble, the crayon is in a fist, and the child has decided tracing is not for them. The page was not too boring. It was too far up the ladder.
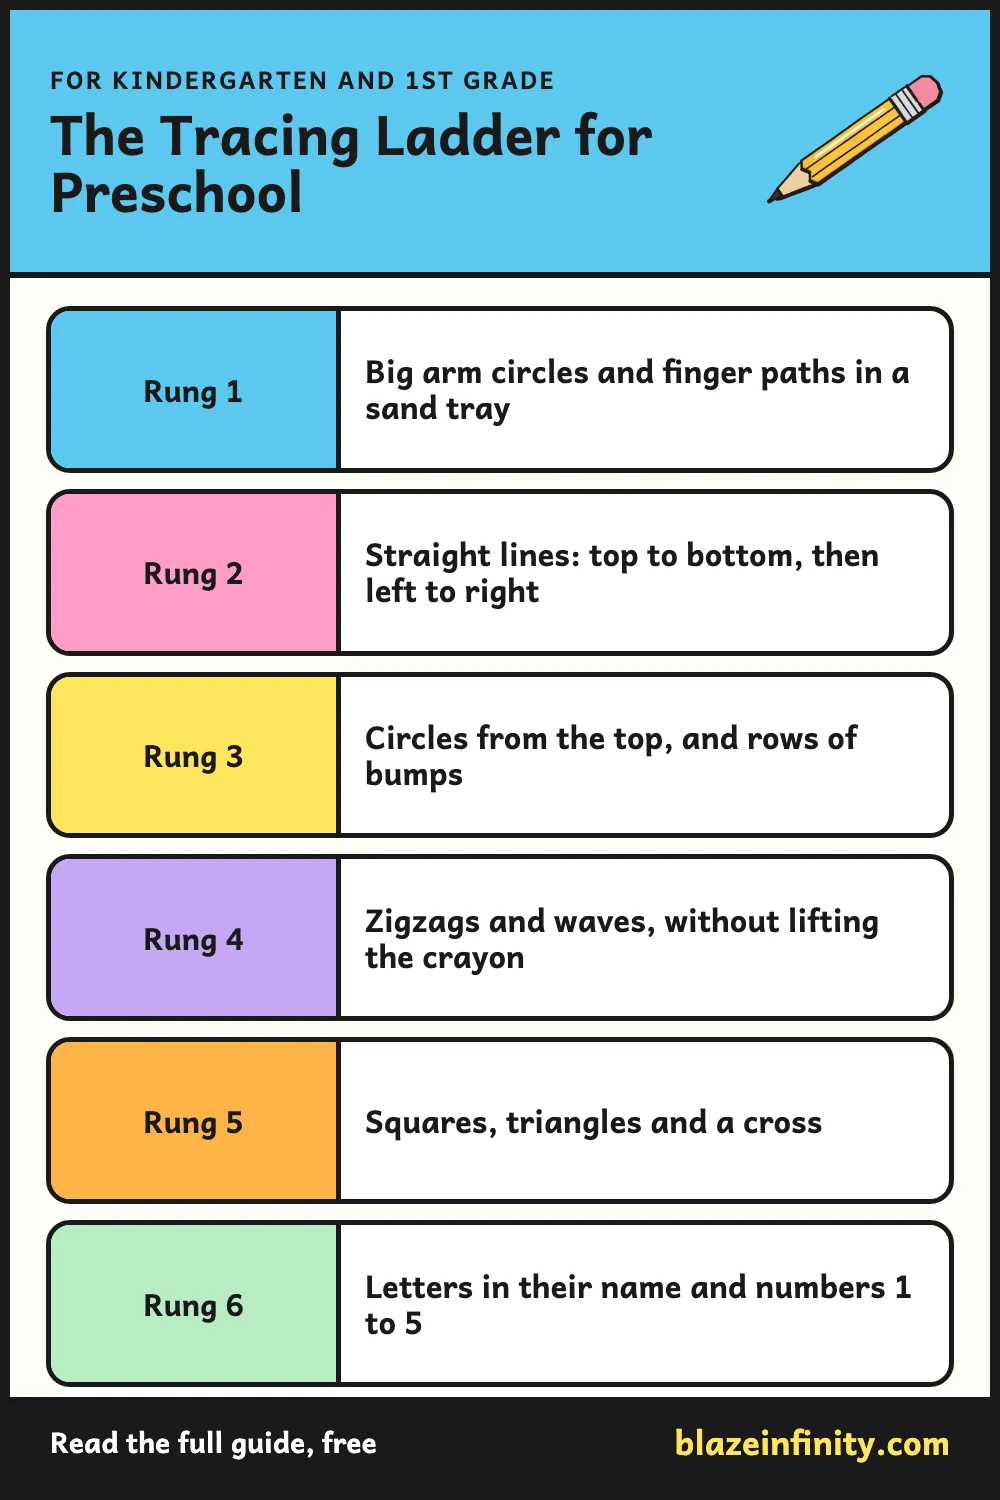
Tracing works when it is taught in order: big movements first, then straight lines, then curves, then lines that turn, then shapes, and only then letters and numbers. Below is each rung, what to hand the child, and the sign that says move up.
The strokes a preschooler needs before letters
Every printed letter and number is built from a few movements: a line down, a line across, a slant, a curve. If a child can make those on purpose, a letter is a short list of things they can already do. If they cannot, a letter is a hard drawing.
These are the six lines to look for on a tracing page.
The castle line looks harder than the zigzag, but it is only straight lines joined at square corners: up, across, down, across. It is a good check that lines up, down and across are all solid.
The tracing ladder: six rungs from scribble to letters
Do not go by age. Two children with the same birthday can be three rungs apart. Find the rung where the child succeeds most of the time, stay there for a while, and move up only when you see the sign.
Rung 1
Big arm movements and finger tracing
The whole arm moves from the shoulder. No pencil yet. Give them a finger in a thin layer of sand or cornmeal in a tray (stay beside any child who still puts things in their mouth), chalk on the sidewalk, a wet paintbrush on a fence, a toy car to drive along a line of tape. Move up when: the child can follow a path with a finger from one end to the other without wandering off to draw something else.Rung 2
Straight lines: down first, then across
The child draws a line down toward the body, then one across from left to right. Give them short, wide paths and a short, fat crayon. Say “top to bottom” and “start at the green dot” every single time. Move up when: the line starts at the start, stops at the end, and stays mostly inside the path.Rung 3
Circles and bumps
Smaller movements now: try for the hand resting on the paper. Teach the circle from the top, going around the way you would write a letter c, and closing where it began. Bumps are half circles in a row. Move up when: the circle closes and the child ends near where they started.Rung 4
Zigzags and waves
Now the hand has to change direction without lifting. Zigzags ask for a full stop at each point. Waves ask the child to keep moving through the turn. Say “up the mountain, stop, down the mountain.” Move up when: the points of the zigzag are points, not loops, and the wave does not flatten into a straight line.Rung 5
Shapes
A square is four straight lines with four stops. A triangle uses slanted lines, so expect it to take longer than the square. Trace the shape, then draw one beside it with no dots. Move up when: corners are corners, and the child can draw a cross and a square with no dots to follow.Rung 6
Letters and numbers
Every stroke now has a set start and a set direction. Begin with the letters in the child's own name and with numbers 1 to 5. Pick pages with a start dot or numbered strokes. Finished when: the child can write the letter beside the traced one, starting in the same place, with no dots.
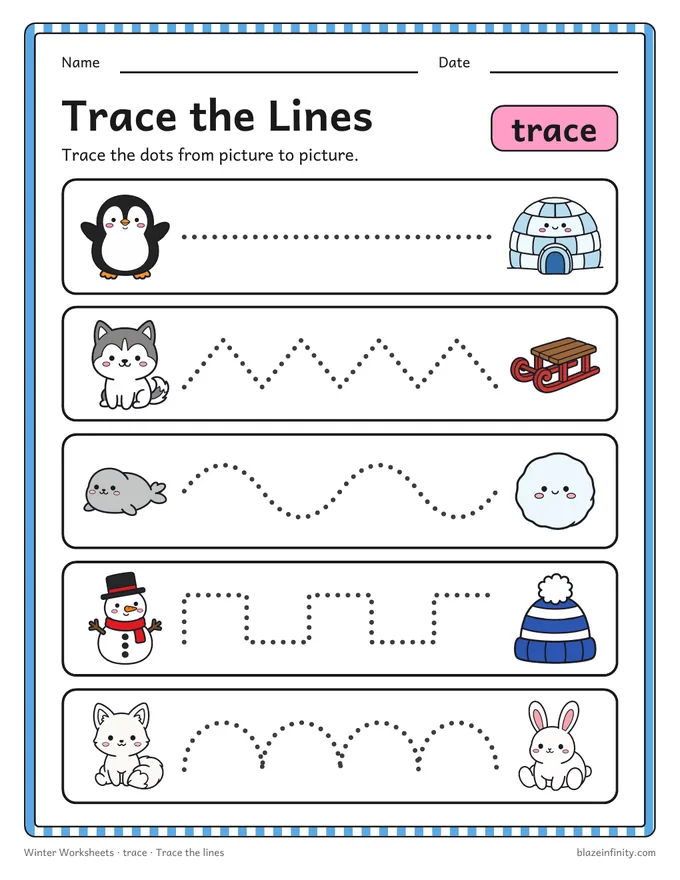
For straight lines, zigzags, waves and bumps, the free tracing lines worksheets give the child a reason to reach the end of the line: each path runs from one picture to another.
Which rung is this child on?
Here is one to try before you read on.
Maya is four. She traces straight lines and circles neatly. On a zigzag, every point turns into a small round loop. Is she ready for triangles? (tap to check)
Not yet. The loops say her hand cannot stop and change direction, so it rolls through the corner instead. Stay on rung four. Put a dot on each point of the zigzag and have her stop and tap on every dot (“up, stop, down, stop”). Castle lines help too, because each corner is a full stop. A triangle is three of those stops, so sharp zigzag points come first.
The general rule is the same for every child: when a page goes badly, do not repeat the page. Drop one rung, make the line bigger, and come back in a week.
When tracing goes wrong: what you see and what to try
If you see
The crayon is held in a fist
The fingers are not yet doing the work, so the whole arm is.
Try this
If you see
Pressing so hard the paper tears
The child is gripping tightly to stay in control.
Try this
If you see
Starting at the bottom of the line
Nobody has made the start obvious.
Try this
If you see
Tracing across from right to left
The child starts wherever the hand happens to be.
Try this
If you see
Rushing and flying off the line
The path is too thin or too long for now.
Try this
If you see
Refusing to trace at all
The page looks like a test they expect to fail.
Try this
Left-handed children
Do not switch the hand. A left-handed child needs three small changes. Turn the paper the other way, so the top of the page leans to the right and the top left corner is higher. Have them hold the crayon a little farther from the tip, so they can see past their fingers. And put your model line above or to the right of where they will trace, because a left hand covers anything on the left.
Many left-handed children also find it more comfortable to pull a short cross stroke from right to left. Let that go on a single stroke. What you keep is the direction of travel across the page: rows of lines, like rows of words, still run from left to right.
Tracing is not handwriting
Tracing pages are useful, and it helps to be clear about what they are useful for.
What tracing practices: holding a tool, starting and stopping on purpose, changing direction, keeping the eyes on the tip of the crayon, and feeling the movement of a shape before having to remember it.
What tracing does not do on its own: teach a child to form a letter from memory. On a tracing page the dots do the remembering. A child can trace a neat letter A and still have no idea where to begin when the dots are gone. A child can also trace a letter in the wrong order, bottom up or in pieces, and the finished page will look perfect. You only find out by watching the hand, not the paper.
So treat tracing as the first of three steps:
- 1
Trace it
Follow the dots, starting at the start dot, while you watch the first one. - 2
Copy it
Write the same line or letter right beside the traced one, with the model still in view. - 3
Write it from memory
Cover the model. “Now make one with no help.” This is the step that tells you whether it has been learned.
For numbers, the free number tracing worksheets follow the same pattern of trace first, then write.

For letters, look for pages that show where each stroke begins. The letter pages in the free alphabet tracing worksheets use numbered steps, and our guide to letter formation explains which letters to teach together and why the starting point matters more than a tidy result.

A five-minute tracing routine for every day
Keep it short and daily rather than one long sitting. Five minutes is enough for a preschooler, and it fits at the start of table time or while dinner cooks.
- Minute 1, wake up the hands. Squeeze play dough, open and close fists ten times, or draw three giant circles in the air with each arm.
- Minute 2, finger first. Trace today's line with a pointer finger, on the page or in a sand tray, saying the words out loud: “down, stop.”
- Minutes 3 and 4, crayon on paper. Three to five lines of one kind only. Watch the first one from start to finish.
- Minute 5, one with no dots. On the back of the page, the child draws the same line alone. Then they circle the one they like most and tell you why.
Before you hand over the page
- Feet flat on the floor or on a box, not swinging
- A short crayon or pencil, not a long one
- The paper tilted to suit the writing hand
- The other hand holding the paper still
- A clear dot showing where to start
- One kind of line today, not six
After the ladder
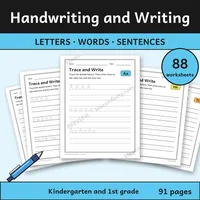
Once a child can trace a letter, copy it and write it with no dots, tracing has done its job. The next step is writing letters at the right size on lines, then short words. Our guide to kindergarten handwriting covers what that looks like across the year. When you need more pages, Handwriting and Writing has a trace-and-write page for every letter and for the numbers 0 to 9, and then moves on to words and sentences.
Common questions
- How do I teach my preschooler to trace?
- Start with big movements and finger tracing, then short straight lines with a clear start dot. Have the child trace with a finger first, then a short crayon, and keep it to about five minutes a day.
- What are pre-writing strokes?
- They are the simple lines that letters and numbers are built from: lines down and across, slanted lines, zigzags, waves, bumps, circles and basic shapes. Children practice them before they trace letters.
- Should preschoolers trace lines or letters first?
- Lines first. A child who can trace straight lines, zigzags, curves and circles with control already knows the movements a letter needs. Letters come last on the ladder.
- Is tracing the same as learning to write?
- No. Tracing practices control and the feel of a shape, but the dots do the remembering. Follow tracing with copying, then writing the letter with no dots.
- How do I help a left-handed child with tracing?
- Keep the left hand. Turn the paper so its top leans to the right, have the child hold the crayon a little farther from the tip, and put the model above or to the right so the hand does not cover it.

The full set for this skill
Handwriting and Writing
Letters and numbers, pictured words, traced sentences and picture prompts. Every tracing line is a single row of dots on a three-line rule.
- Trace and write every letter, Aa to Zz
- Numbers 0 to 9
- 60 short vowel words beside their pictures
- 20 sentences to trace and copy, each with a matching picture
- 20 picture prompts with a word box